
Understanding Plumber’s Putty: Drying, Curing, and Best Practices
Introduction
Plumber’s putty is an essential material used by both professional and DIY plumbers for sealing, securing, and sealing different plumbing fixtures such as sinks, faucets, and drain assembly components. Its unique properties, ease of application, and reliable sealing capabilities make it a popular choice in plumbing projects. However, to ensure a long-lasting and effective seal, understanding its curing process, drying times, and best application practices is crucial. This article provides an in-depth look at plumber’s putty, focusing on its drying characteristics, recommended curing times, factors affecting drying, and essential tips for optimal results. You May Also like: locate budget friendly emergency plumber nearby.
What is Plumber’s Putty?
Plumber’s putty is a soft, malleable sealing compound made primarily from clay, linseed oil, and other proprietary ingredients. It is designed specifically for creating a watertight seal around fixtures such as sinks, drains, and fittings. Its versatile nature allows it to be easily shaped and molded, ensuring a snug fit and preventing leaks.
Key Features:
-
- Easy to mold and apply
-
- Remains flexible over time
-
- Resistant to water and moisture
-
- Suitable for non-pressurized applications
Note: While plumber’s putty is highly effective for many uses, it is not recommended for use on any component that will be exposed to continuous water pressure or is permanent such as along the edges of glass, as it may stain or degrade over time.
The Drying Process of Plumber’s Putty
One common misconception about plumber’s putty is that it dries in the traditional sense like paint or cement. In reality, plumber’s putty skins over and becomes dry to the touch within approximately 15 to 30 minutes after application. However, this surface drying does not mean the material has fully cured or set, which is critical for its sealing performance.
Understanding Skinning Over
-
- The skin refers to the dry, hardened surface that forms as a result of moisture evaporation.
-
- This process creates a sealing layer that prevents water from penetrating.
-
- The inner part of the putty remains soft and pliable for some time after skinning.
Curing Time and Full Seal
Despite skinning over within 15-30 minutes, it is strongly recommended to wait at least 24 hours before exposing the sealed area to water, heavy use, or stress. This cure time ensures that the putty sets properly, providing maximum durability and preventing leaks.
Factors Influencing Drying and Curing Time
The exact drying and curing times of plumber’s putty can vary significantly depending on multiple factors, including:
-
-
Product Type and Brand
Different brands and formulas may have different curing formulations; always refer to manufacturer instructions.
-
-
-
Room Temperature
Higher temperatures can accelerate drying, while cooler environments may delay the process.
-
-
-
Humidity Levels
High humidity can slow down the skinning and curing process, whereas dry air facilitates quicker drying.
-
-
-
Application Thickness
Thicker layers of plumber’s putty take longer to skin over and cure fully.
-
-
-
Air Circulation
Good ventilation helps speed up the drying process by removing moisture from the surface.
-
Best Practices for Applying and Curing Plumber’s Putty
To ensure the best results when working with plumber’s putty, consider these expert tips:
1. Proper Surface Preparation
-
- Clean the surface thoroughly to remove dirt and grease.
-
- Dry the surface completely before application to maximize adhesion.
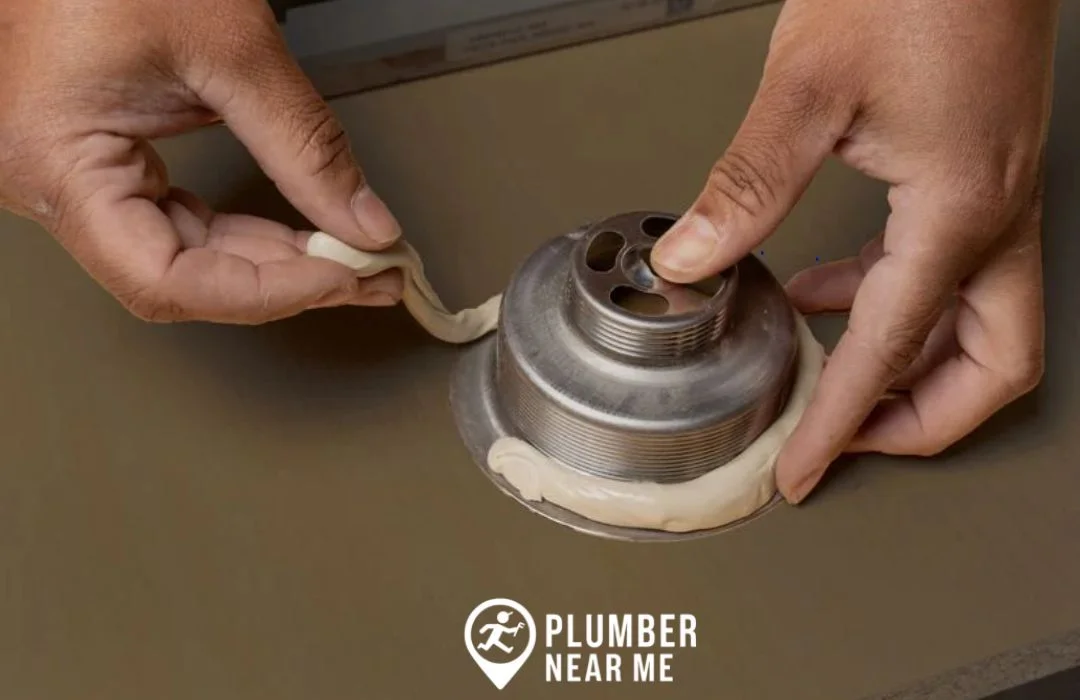
2. Applying the Putty
-
- Break off small pieces of putty and roll into a snake-like shape.
-
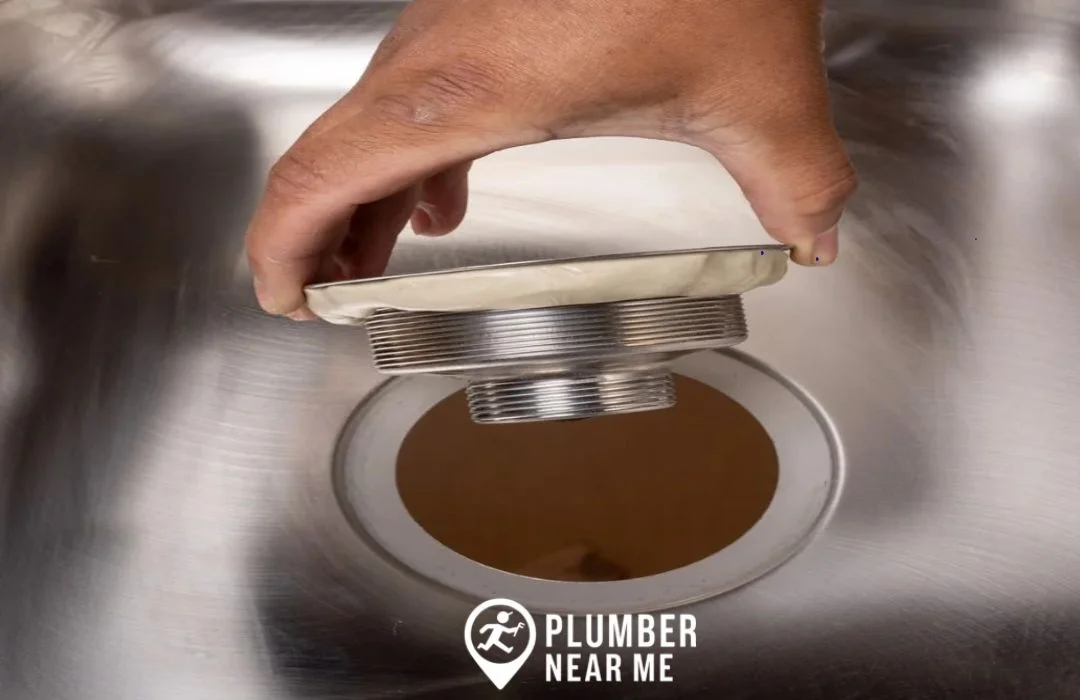
- Place the putty around the flange or seal area evenly.
-
- Ensure a continuous and tight seal without gaps.
3. Skinning Over
-
- Allow the putty to skin over for 15-30 minutes.
-
- Avoid disturbing the putty during this time.
4. Waiting Period Before Use
-
- Do not expose the area to water or heavy use before at least 24 hours.
-
- Follow specific product instructions for best curing times.
5. Regular Inspection
-
- Periodically check for cracking or detachment.
-
- Reapply if necessary to maintain a watertight seal.
When to Use Alternative Sealants
While plumber’s putty is excellent for many applications, there are situations where alternative sealants might be more appropriate:
-
- For permanent, pressure-resistant sealing, consider silicone caulk.
-
- For areas exposed to constant water or submersion, epoxy or specialized waterproof sealants are preferred.
-
- If working on materials like granite or marble, ensure the sealant is safe for porous surfaces to prevent staining.
Safety and Handling Tips
-
- Always wear gloves when working with plumber’s putty to avoid skin irritation.
-
- Store unused putty in a sealed container to prevent it from drying out.
-
- Follow manufacturer instructions for disposal and cleanup.
Common Mistakes to Avoid
-
- Applying too thick a layer of putty, which prolongs drying time.
-
- Using old or dried out plumbing putty, which reduces effectiveness.
-
- Exposing the seal before it’s fully cured, risking leaks.
-
- Not cleaning surfaces properly before application, leading to poor adhesion.
Where to Find Professional Help
Sometimes, DIY solutions may not suffice, especially in complex or critical plumbing installations. For reliable assistance, consider finding a plumber near me through trusted providers like Plumber Near Me. Whether it’s emergency plumber near me or a licensed plumber near me, professional plumbers can ensure proper sealing, installation, and more complex repairs.
Conclusion
Plumber’s putty is an indispensable tool for creating watertight seals in various plumbing applications. While the skin forms within 15-30 minutes, and the material may feel dry to the touch, it is crucial to wait at least 24 hours before exposing it to water or use. This curing period guarantees the seal’s strength and durability.
Remember, factors like room temperature, humidity, and application thickness influence drying times. Always follow manufacturer instructions for optimal results. Proper application and patience will ensure the long-term performance of your plumbing fixtures.
By understanding the curing process, you can confidently work with plumber’s putty and prevent common issues such as leaks or premature failure.
FAQs
1. How long does plumber’s putty take to fully cure?
Typically, it takes at least 24 hours for plumber’s putty to fully cure and achieve its maximum sealing strength. Skinning over occurs within 15-30 minutes, but full curing ensures long-lasting results.
2. Can I expose plumber’s putty to water immediately after application?
No. It is best to wait at least 24 hours before exposing the sealed area to water or heavy use to ensure the seal is fully set.
3. Does weather affect the drying time of plumber’s putty?
Yes. Higher temperatures can speed up drying, while higher humidity can delay it. Ensure proper ventilation and temperature control for optimal results.
4. Is plumber’s putty suitable for all plumbing materials?
Plumber’s putty is generally safe for metal and ceramic surfaces, but not recommended for porous materials like marble or granite that might stain or degrade. Always consult manufacturer guidance.
5. What should I do if my plumber’s putty cracks after drying?
Cracking may indicate insufficient curing, overapplication, or movement. Remove the cracked putty, clean the surface, and reapply a fresh layer, ensuring proper curing time.
Remember, patience and proper application are key to ensuring a seal that lasts. If you’re in need of professional plumbing services, can’t find a plumber near you, or require expert assistance, consider reaching out to Plumber Near Me for qualified and reliable help.
Call Now for More Information
If you’re working with plumber’s putty, it’s important to remember that while it sets fast, it still needs adequate curing time to ensure a watertight seal. Using it too soon can cause leaks or weak joints. For expert guidance or immediate plumbing assistance, contact a trusted local plumber today. They can save you time, prevent costly damage, and make sure your repair or installation is done right the first time.


