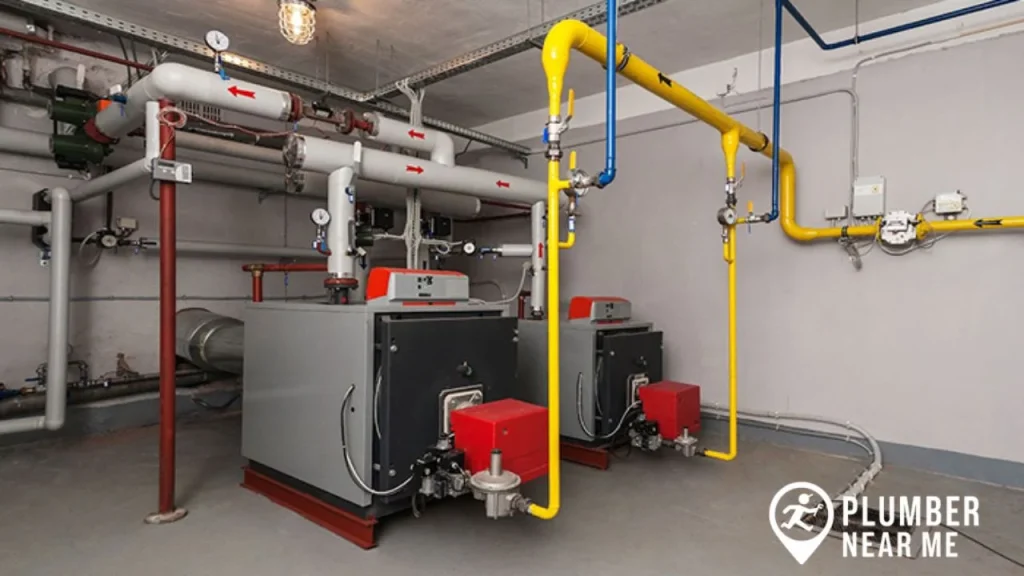
Gas line connection is one of the most critical parts of any home plumbing or heating system. Whether you’re looking into connecting gas to a house, installing a new appliance, or simply learning the process, understanding how professionals connect steel gas pipes can give you valuable insight into the work. You May Also Like: Clogged Shower Valve.
⚠️ Important: Working with gas lines is not a DIY project. Any mistakes can cause dangerous leaks, fire hazards, or even explosions. Only licensed professionals should attempt a gas line connection. This guide is intended to educate homeowners and students of plumbing about the methods, tools, and safety steps used by experts—not as a how-to for untrained individuals.Connect with trusted experts at Plumber Near Me for reliable plumbing services near you.
Safety First: What You Need to Know Before a Gas Line Connection
Before learning how to connect to gas pipes, safety must come first. Gas is flammable, toxic, and invisible—making mistakes potentially deadly. Here are key precautions professionals always take:
- Certified Training & Permits – In most regions, connecting gas lines legally requires a license or gas-fitting certification. Local regulations often demand inspections after installation.
- Essential Safety Gear – Professionals never work without:
- Gas leak detector
- Fire extinguisher
- Safety glasses & gloves
- Ventilation fans (to disperse fumes)
- Shut Off Before Work – The gas supply must always be turned off and the line fully depressurized before any cutting or connection.
Tools and Materials Needed
The method of connection—traditional threading or modern press-connect fittings—determines which tools a plumber will use.
For Traditional Threading:
- Pipe cutter or power threading machine
- Reamer (for smoothing pipe edges)
- Threading dies and cutting oil
- Gas-rated pipe dope (sealant)
- Pipe wrenches
For Press-Connect Method:
- Metal cutting saw or band saw
- Emery cloth (to clean cut ends)
- Press-connect fittings
- Hydraulic or battery-powered crimping tool
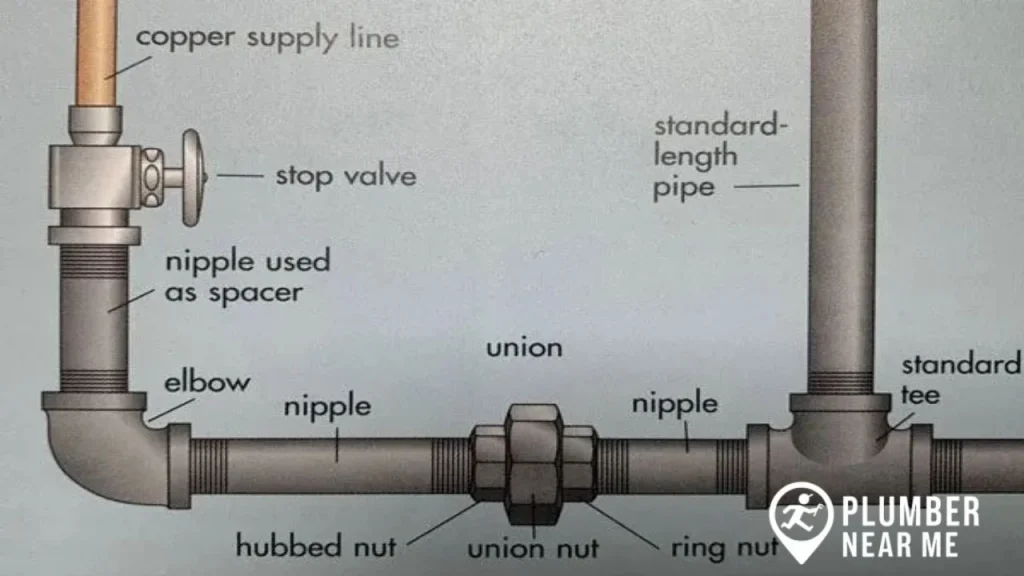
Step-by-Step: Traditional Threaded Gas Pipe Connection
This is the classic way plumbers handle steel gas pipes. It’s time-tested and reliable but requires skill.
- Cut the Pipe – Using a machine, the pipe is cut to the right length with a clean, square edge.
- Ream the End – Sharp edges and burrs inside the cut are removed to prevent restricting gas flow.
- Thread the Pipe – Special threading dies cut spiral grooves into the pipe end. Cutting oil reduces friction and protects the die.
- Apply Sealant – Gas-rated pipe dope (or sometimes Teflon tape) is applied to threads to ensure a leak-free seal.
- Tighten the Fittings – The threaded pipe is joined to elbows, tees, or couplings. Wrenches are used carefully—tight enough for safety, but not over-tightened to avoid cracks.
Step-by-Step: Press-Connect Method
A newer approach gaining popularity, especially in commercial jobs and tight spaces, is the press-connect system.
- Cut & Prepare Pipe – A saw makes a precise cut, then the emery cloth smooths the edges.
- Mark Depth – The fitting is dry-fitted, and the insertion depth is marked to ensure a proper seal.
- Crimp the Fitting – A press tool compresses the fitting onto the pipe, locking it in place with a permanent, gas-tight seal.
This technique is much faster (a connection can take under a minute), requires less labor, and avoids some of the common mistakes of threading.
Comparing Threading vs. Press-Connect
| Method | Pros | Cons |
|---|---|---|
| Threading | Time-tested, durable, easier to disassemble later | Slower, requires skill, risk of leaks if poorly done |
| Press-Connect | Faster, consistent results, fewer skills needed | Costlier tools & fittings, harder to modify later |
Both methods are effective, and the choice depends on the project, budget, and plumber’s preference.
Common Mistakes to Avoid
Even professionals must be cautious when performing a gas line connection. Here are errors that can cause serious problems:
- Over-tightening threaded fittings (can crack the pipe or fitting)
- Using non-approved sealants or tapes
- Skipping leak tests after installation
- Poorly placed or unsupported gas lines
- Attempting DIY work without permits or training
Maintenance and Inspections
Once the gas line is installed, regular inspections are crucial:
- Check for Corrosion – Steel pipes are strong but can rust over time.
- Test for Leaks – Professionals use electronic gas detectors or soap solution on joints.
- Inspect Valves & Fittings – Ensure shut-off valves are working properly.
- Look for Signs of Trouble – A sulfur smell, dead vegetation near buried lines, or hissing noises mean you may have a gas leak.
⚠️ If you ever suspect a leak—leave immediately and call your gas company or 911.
Final Thoughts
Learning how to connect steel gas pipes helps homeowners understand the complexity and importance of professional work. Whether it’s connecting gas to a house, running a new appliance line, or upgrading a system, the process requires precision, proper tools, and strict safety standards.
👉 Need a reliable professional for your next gas line connection? Visit Plumber Near Me to connect with trusted experts who ensure safe, code-compliant installations.
FAQs
What is the safest way to connect steel gas pipes?
Both threading and press-connect are safe when done by licensed plumbers, but press-connect is often faster and more consistent.
Can I connect to gas lines myself?
No. DIY gas work is dangerous and often illegal without a license. Always hire a professional.
What sealant should be used on gas pipe threads?
Only gas-rated pipe dope or Teflon tape specifically designed for gas should be used.
How do I know if I have a gas leak?
A rotten-egg smell, hissing sounds, or dead grass near a buried line can indicate a leak. Always evacuate and call your utility provider.